Supporting several Twitch channels can quickly become expensive. The most direct way to look for cheap Twitch subs is to compare the prices Twitch displays in different regions.
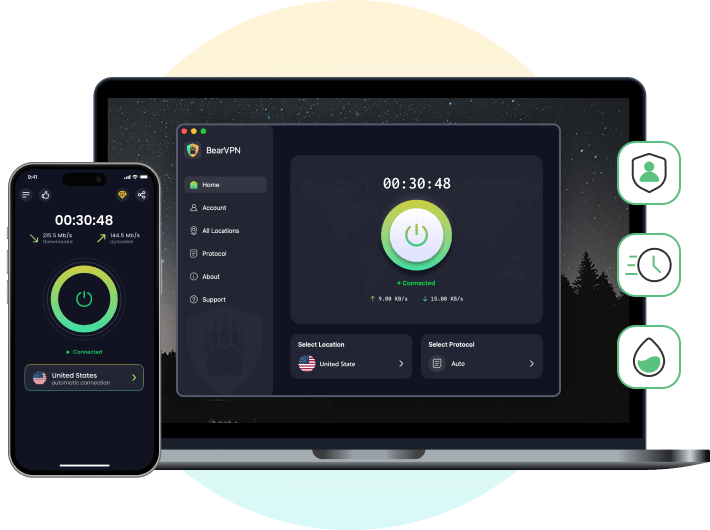
BearVPN lets you connect to an available server in another market and check the regional offer shown on Twitch. You can then compare it with your regular price, Prime benefit, multi-month options and current Twitch promotions before deciding how to subscribe.
How to Get Cheap Twitch Subs: 4 Best Methods
Start by comparing regional pricing with BearVPN, then check the other savings available to your account. The options below cover different situations, from buying subscriptions for several channels to using a Prime benefit you already pay for.
Method 1: Use BearVPN to Explore Lower Twitch Regional Prices
Twitch uses Local Subscription Pricing, so the same subscription tier can have different prices across countries. BearVPN lets you connect through a server in another market and check whether Twitch presents a lower regional offer.
The key is to compare the actual checkout total. A different currency symbol does not automatically mean a better deal, and the price displayed before payment may not be the final amount charged.
Twitch Sub Prices by Country: What Should You Compare?
Use Twitch’s official country price list as your starting point, then check the subscription offer on the channel you want to support.
Which country has the cheapest Twitch subs?
There is no permanent answer: Twitch can change regional prices, and exchange rates affect comparisons. If you are researching Turkish Twitch subs, check Turkey’s current listing instead of relying on an old screenshot or a guide promising a fixed price below $2.
Before selecting a country, also check that the location is available in your BearVPN server list.
How to Compare Twitch Regional Prices with BearVPN
Step 1. Install BearVPN and Check Your Server Access
Download the official BearVPN app for your device. Before comparing prices, confirm that your current plan includes an available server in the region you want to check. The free mobile connection does not provide access to every country.
Step 2. Connect to the Region You Want to Compare
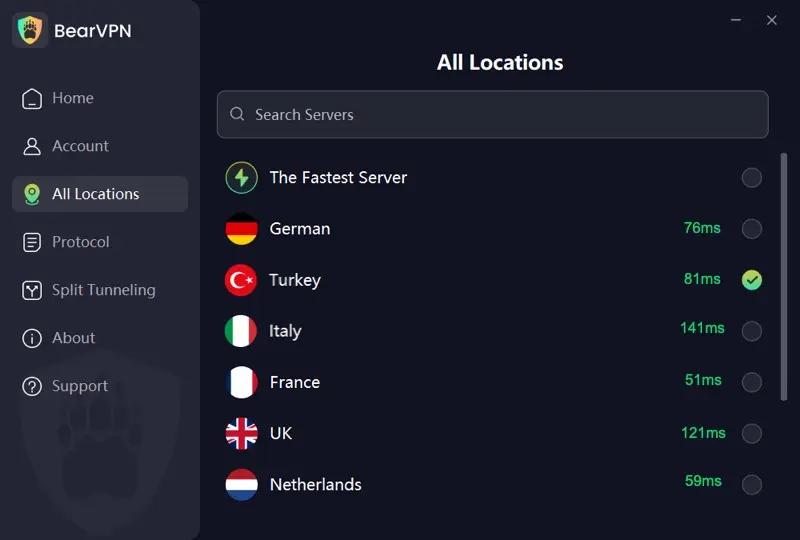
Open BearVPN, choose an available server in the target region, and connect. Compare only regions that BearVPN currently offers and that you are permitted to use; a changed IP does not guarantee Twitch account or payment eligibility.
Step 3. Reopen Twitch and Compare the Final Checkout Amount
Reopen Twitch in a fresh browser session, then check the same channel, subscription tier, and billing duration. Compare the final checkout amount—not only the displayed headline price—because currency conversion, taxes, payment fees, and renewal terms can change the real cost.
Use accurate account and billing information. A different regional offer may appear after the IP changes, but Twitch can still apply residence, account, and payment-method requirements before completing the purchase.
If Twitch Does Not Refresh the Regional Offer
- Close and reopen Twitch after connecting to the new server.
- Start a fresh browser session if an old price is still cached.
- Make sure the full browser or Twitch app is using the BearVPN connection.
- Change the VPN protocol only if the current network blocks or destabilizes the connection.
- Use Split Tunneling only when necessary; routing the full browser is clearer for the first comparison.
Method 2: Claim Your Monthly Twitch Sub with Amazon Prime
If you already have an eligible Amazon Prime membership, check whether your monthly Twitch channel subscription benefit is available. It lets you support one eligible channel without paying a separate subscription charge.
To use it:
- Sign in to the Amazon account that holds your eligible Prime membership.
- Link it to the Twitch account you use.
- Open the channel you want to support in a browser and select Subscribe.
- Look for the Prime subscription option and confirm whether your benefit is available.
Check the next availability date in your account and return to use the benefit again when it becomes available.
Membership and regional eligibility can differ, so do not assume every Prime Video plan or shared family membership includes a separate Twitch subscription. If you would be buying Prime only for this benefit, compare its membership cost with a direct Twitch subscription first.
Method 3: Compare Web Checkout and Multi-Month Plans
Before buying a Twitch sub in the mobile app, open the same channel in a browser and compare the offer. Check the same subscription tier and duration so you are comparing equivalent purchases.
Then review any 3-month or 6-month options available at checkout:
- Note the total upfront charge.
- Divide it by the number of months to find the effective monthly cost.
- Compare that figure with the one-month option.
- Check the renewal price and any first-term discount conditions.
A longer plan only saves money if you would otherwise keep supporting that channel for the full period. Also check whether an event discount replaces the normal offer rather than stacking with it.
Complete the purchase through Twitch. A third-party seller’s claimed discount or high rating does not establish that Twitch authorizes the offer, and you should never provide a seller with your Twitch password or verification code.
Method 4: Check SUBtember and Other Official Twitch Promotions
Before paying, check whether an official Twitch promotion applies to your subscription.
This SUBtember offer is scheduled to end on October 1, 2026 at 10:00 AM PT. Availability, eligible channels, subscription types, discount levels, and end times may change. Check Twitch’s current Promotions page before subscribing.
As of September 11, 2026, SUBtember is running through October 1 at 10:00 AM PT. Eligible purchases receive:
The offer covers qualifying first terms, conversions and upgrades. Existing recurring subscriptions are excluded, and canceling during the promotion to repurchase does not qualify. The discount cannot be combined with other offers or discounts.
Read the eligibility details and renewal amount at checkout before choosing a plan.
Do Streamers Still Get Paid If You Buy Cheap Subs?
Yes. A valid Twitch channel subscription still supports the creator, but the payout is not identical for every subscription.
Regional prices and the creator’s applicable revenue arrangement can affect earnings. A lower-priced regional sub should not be described as paying the same amount as a full-price US subscription.
Official promotions can work differently. For SUBtember 2026, Twitch says it covers the discount so creators receive the payout associated with the eligible full-priced subscription.
Prime subscriptions also have a separate payout model. Twitch introduced country-based fixed rates in June 2024, so a Prime sub should not be described as automatically paying the standard US subscription rate.
Final Thoughts: Stop Overpaying on Twitch
Before paying for a Twitch subscription, compare all four routes: the regional checkout price, an eligible Prime benefit, web or multi-month pricing, and any current official Twitch promotion.
Compare the same tier and duration, then review the final charge, currency conversion, taxes, renewal price, account eligibility, and payment requirements. A different IP can reveal another regional offer, but it does not guarantee that your account or payment method qualifies.
FAQs About Cheap Twitch Subs
There is no permanently cheapest country. Regional price updates, exchange rates and payment charges can change the comparison. Use Twitch’s official country list to compare the same subscription tier, then check the final charge. If you use BearVPN to explore another region’s offer, confirm that the server is available and that your account and payment method qualify for the displayed price.
BearVPN lets you connect to an available server in a country where Twitch may display a lower regional subscription price. After connecting, reopen Twitch and compare the amount shown at checkout with your usual price.
The final offer and payment result can still depend on Twitch’s current pricing, your account, payment method, taxes and checkout verification, so a lower price cannot be guaranteed.
Twitch’s official country list shows a standard US Tier 1 web price of $5.99. Other countries and purchase platforms can show different amounts. Check that you are comparing the same subscription tier and duration, then review any taxes, promotions and renewal terms. The amount displayed for your purchase at checkout is the figure to use.
Find Turkey in Twitch’s official local subscription price list and check the listed currency and subscription tier. Then compare the offer shown on the channel’s checkout page. Avoid relying on old dollar conversions: exchange rates and regional prices can change. If you connect through an available Turkey server with BearVPN, your account and payment setup can still affect the offer you receive.
No VPN provider can guarantee that Twitch will accept a purchase or take no account action. BearVPN controls your network connection; it does not control Twitch’s account or payment decisions. Use accurate billing details, follow Twitch’s purchase terms and keep your login credentials private. Connection obfuscation should not be treated as protection against account enforcement.
An eligible Amazon Prime membership can include a monthly Twitch channel subscription at no additional subscription charge. Link the eligible Amazon account to your Twitch account and check the Prime option on the channel’s subscription page. If it is unavailable, check whether the benefit has already been used and whether your membership qualifies. Prime itself is a paid membership.
- Connect to an available region you want to compare.
- Reopen Twitch and check the same tier at checkout.
- Use accurate billing details—the final offer still depends on eligibility.