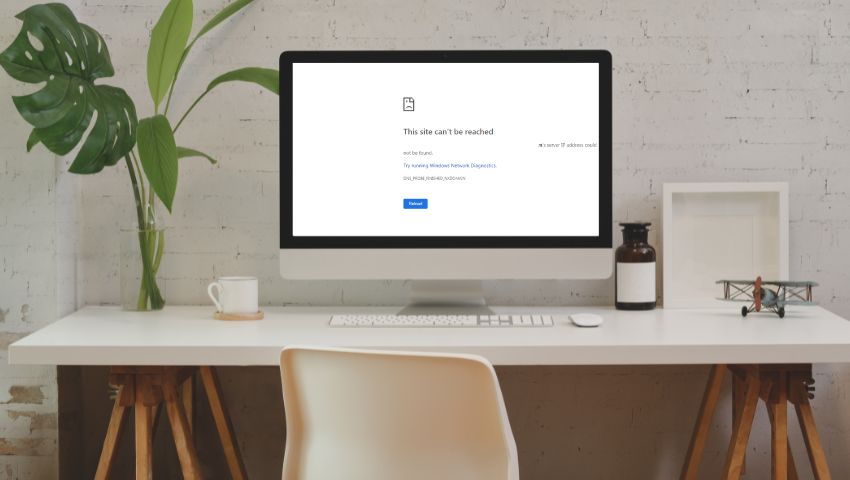
If you’ve encountered the error message “Server IP address could not be found,” you’re likely struggling to access a website because your device cannot connect to it. This message means your device couldn’t resolve the website’s domain name to an IP address, preventing you from viewing the site.
Why does this error happen and how to troubleshoot it? This article will help you get back to browsing quickly.
Why Does Server IP Address Could Not Be Found Happen
This error typically occurs when your device fails to connect to a website, often due to DNS (Domain Name System) issues, poor internet connectivity, or misconfigured network settings. Here are some common causes:
- DNS resolution issues: When your browser cannot translate the website’s domain name into its corresponding IP address.
- Browser problems: Corrupt or outdated browser cache and cookies may interfere with loading websites.
- Proxy/Network configuration errors: Incorrect proxy or network settings may block access to the website.
- VPN interference: Sometimes, a misconfigured VPN or its server location can lead to connectivity problems.
Identifying the root cause can help you select the appropriate fix from the solutions below.
How to Quickly Fix Server IP Address Could Not Be Found
1. Ensure Your Internet Connection is Active
Before attempting more complicated solutions, start with the basics—check your internet connection. If your connection is down or unstable, it can prevent your device from connecting to websites, causing the “Server IP Address Could Not Be Found” error.
Step 1: Verify your device is connected to Wi-Fi or Ethernet.
Step 2: If you’re using Wi-Fi, try moving closer to the router for a stronger signal.
Step 3: Restart your router or modem to reset the connection.
If the issue persists, proceed to the next troubleshooting step.
2. Clear Your Browser Data (Cache and Cookies)
Old cache and cookies can build up in your browser, leading to connection issues. Clearing these files will allow your browser to retrieve fresh information and can often resolve the error.
Step 1: Open your browser (e.g., Google Chrome).
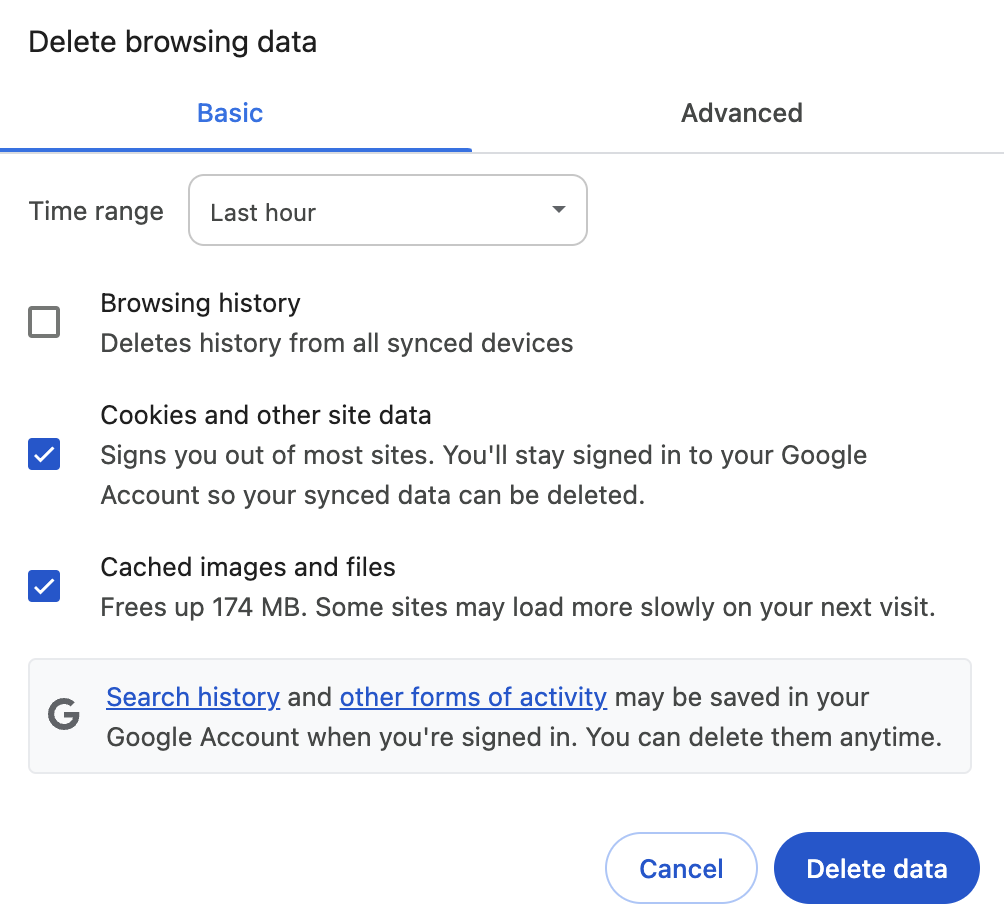
Step 2: Click on the three dots in the upper-right corner and go to Settings > Privacy & Security > Delete Browsing Data.
Step 3: Choose “Cookies and other site data” and “Cached images and files” to delete.
Step 4: Click Delete Data.

After clearing your data, restart your browser and try accessing the website again.
3. Restart Google Chrome (or Your Browser)
If clearing your browsing data doesn’t help, try restarting your browser. Sometimes, browser glitches or temporary issues can prevent web pages from loading correctly.
Step 1: Close your browser completely.
Step 2: Reopen it and attempt to visit the site again.
This step can clear up any minor temporary issues in the browser itself.
4. Verify Proxy Settings
If you’re using a proxy server to access the internet, an incorrect proxy setting may be causing connectivity issues. Ensure that your proxy settings are configured correctly or completely disabled.
Step 1: Open your browser settings.
Step 2: Navigate to Settings > Advanced > System > Open Proxy Settings.
Step 3: Ensure that the proxy settings are set to “No Proxy” or configured properly if needed.
Once this is done, check if the issue is resolved.
5. Make Sure Your VPN Server is Working
A VPN (Virtual Private Network) can sometimes interfere with website access, particularly if the server you’re connected to is slow or experiencing downtime. Disconnecting from the VPN or switching to another server might resolve the issue.
Step 1: Check if your VPN is currently connected.
Step 2: Try switching to a different VPN server location.
Step 3: If the error persists, disconnect from the VPN temporarily and check if the issue is resolved.
This method helps rule out any VPN-related interference.
6. Flush DNS Client Cache
A corrupted DNS cache can cause issues with resolving website addresses, triggering the “Server IP Address Could Not Be Found” error. Flushing the DNS cache will force your device to get fresh DNS information from the network.
Step 1: Press Windows + R, type cmd, and press Enter.
Step 2: In the Command Prompt window, type ipconfig /flushdns and hit Enter.
Step 3: Restart your browser and check if the issue is resolved.
Flushing the DNS cache can often clear up underlying DNS resolution problems.
7. Reset IPv4 Settings
Sometimes, incorrect IPv4 network settings can cause this error. Resetting these settings can restore proper network functionality and fix the issue.
Step 1: Open Control Panel and go to Network and Sharing Center.
Step 2: Click on Change adapter settings.
Step 3: Right-click on your active network connection and select Properties.
Step 4: In the Networking tab, select Internet Protocol Version 4 (TCP/IPv4) and click Properties.
Step 5: Choose Use the following DNS server addresses and enter default settings or your ISP’s DNS addresses.
Once the settings are reset, restart your computer and check if the issue is resolved.
8. Run a Network Diagnostic on Windows
Windows has a built-in troubleshooter that can automatically detect and fix network-related problems. Running this tool can help diagnose DNS or other network issues quickly.
Step 1: Right-click the network icon in the system tray and select Troubleshoot Problems.
Step 2: Follow the on-screen instructions to allow Windows to detect and fix any network issues.
This diagnostic tool is often an easy way to resolve networking issues without needing manual adjustments.
Conclusion
In most cases, the “Server IP Address Could Not Be Found” error is a simple issue that can be resolved with a few basic troubleshooting steps. By following the methods above, you should be able to resolve this error and get back to browsing. If the problem continues, consider seeking further assistance from your ISP or a network professional.


